Saturday, March 27, 2010

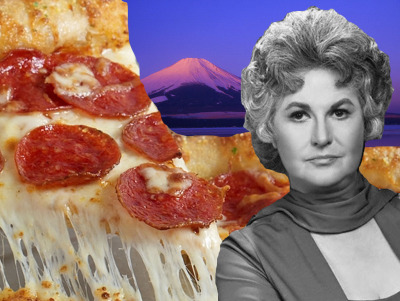
The Joy of Photoshop #2: Bea Arthur Mountains Pizza

Clearly, this is the way Photoshop was always meant to be used.


And there are MORE.

Thursday, March 25, 2010

Tutorial #5: MP3 Player Design

I've always been interested in product design, but assumed that they usually do these sorts of drawings using a 3D program. When I saw this tutorial, I was extra excited.

The tutorial uses almost nothing but blending options to create the 3D effects. It's probably not the most practical way to create this effect, but it certainly worked.

I'm not sure if this is an actual product, but in the middle of my tutorial I noticed something kinda fishy.


APPLE LAWSUIT

My end result was pretty sweet looking though:


Woah! It actually LOOKS LIKE THE EXAMPLE.
I'm rather surprised and pleased with this tutorial. It was easy, clear, and ended up looking fantastic. I wish there was more room to play around, but I don't really have any other complaints.

Just kidding.

One complaint that I did have, was that they were giving you specific dimensions for every step, but never explained how to CREATE those dimensions. I spent a good bit of the tutorial, just trying to figure out how to specify the dimensions of an object. Eventually, I gave up and guessed. It made the tutorial a bit harder to follow, but it still worked. SO WHATEVER.

Length of time: Entire project: 2 hours.
Level: Intermediate.
Clarity:
Handiness:
Cool factor:
Source: http://www.zymic.com/tutorials/photoshop/mp3-player-design/

The Joy of Photoshop #1: Today in class I shooped...


Am I the only person who thinks this image is 5 times funnier because the istockphoto watermark is still on the stool?

These last couple days have been rather distracting (but productive, I swear).

My latest idea has been to Photoshop all original 150 Pokemon characters from bits and pieces of animals and such - IN ORDER. (And hopefully without referencing a certain Photoshop Phriday at SomethingAwful.)
I'll post them 10 at a time, or something.

As for the tutorials, I've gone from working one a night, to working on a couple at a time. I'll just throw them on here as I finish them.

That is all.

Friday, March 19, 2010

Tutorial #4 - Creating Energy Spheres

Today's tutorial is Creating Energy Spheres in Photoshop.

I've been trying to get the hang of this whole glowing energy effect, but no tutorial has been able to explain it quite right. Will this one prove different?

Before:


After:


Nope.

But, as always, I made the best of it.

I've tried several glow tutorials, but something always gets lost in the process. This one was no better, however, they did lead me to some really nice energy ball brushes.
Lets just say that copying and overlaying the layers for the energy balls helped IMMENSELY.

Length of time: Entire project: 1 hour. Energy balls: 20 minutes.
Level: Intermediate.
Clarity:
Handiness:
Cool factor:
Source: http://www.developertutorials.com/blog/design/photoshop-design/creating-energy-spheres-in-photoshop-119/

Wednesday, March 17, 2010

Tutorial #3 - Pop Art Inspired by Lichtenstein

There are so many sweet looking pop-art/comic style tutorials out there, I decided to try another.

Today's tutorial is Pop Art Inspired by Lichtenstein by Melissa Clifton. I've actually used some of her line art tutorials in the past. They're always super helpful.

Before:


Here's my finished product:


I've been meaning to learn how to create the halftone dot pattern for quite a while now. I feel like there's a better way to do it, but her tutorial was still super clear and got the job done. She's not only indepth with her instructions, but also provides a lot of screenshots.


Length of time: 50 minutes.
Level: Beginner.
Clarity:
Handiness: (Really handy if you're into comics.)
Cool factor:
Source: http://www.melissaclifton.com/tutorial-popart.html

Tutorial #2 - Give Your Photos a Retro Comic Book Effect

I know I said that I was going to post once a day, but that might have been a lie. Lets just say that "A Photoshop A Day" sounds a whole lot better than "A Photoshop Every Once In A While."
I also just realized that "A Photoshop A Day" can be abbreviated as "A PAD."
Now, that's just awesome.

Today's tutorial is Give Your Photos a Retro Comic Book Effect.

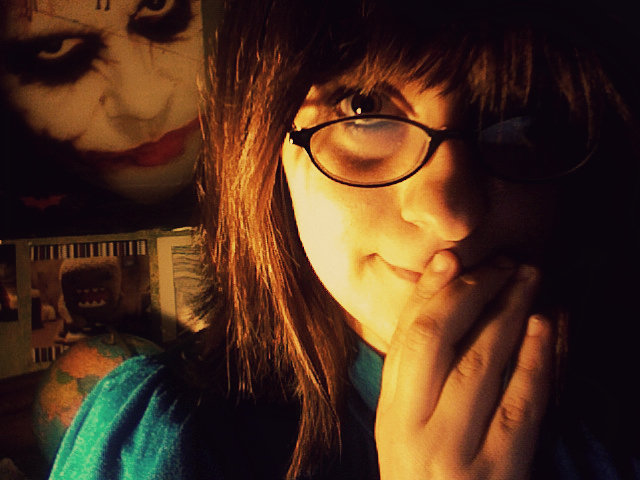
I used a Photo that a livejournal friend of mine took a few weeks ago.


I chose not to add the comic style boxes and border, only because I liked the pop-art feel of the photo itself.

The tutorial was extremely easy and informative. Not only would this be a great beginner project, but it also looks super cool.
My only suggestion would be to offset the halftone layer a few nudges. It makes it feel more realistic. Halftones are rarely ever layered perfectly.

Length of time: 5 minutes without the text boxes.
Level: Beginner.
Clarity:
Handiness:
Cool factor:
Source: http://www.photoshoproadmap.com/Photoshop-blog/2007/09/13/give-your-photos-a-retro-comic-book-effect/